I stream my study sessions. For the accountability, and because the community in the Study Together Discord is genuinely great.
I’ve been using Pomodoro for years. It works best for me to stay focused long-term without burning out. When I step away from the desk mid-stream, my accountability partners should see why, and in how many minutes I’ll be back.
The existing overlays were too packed. I wanted something clean that doesn’t distract me. So I built it myself. Free, runs in the browser, nothing to install. Here’s what it looks like →
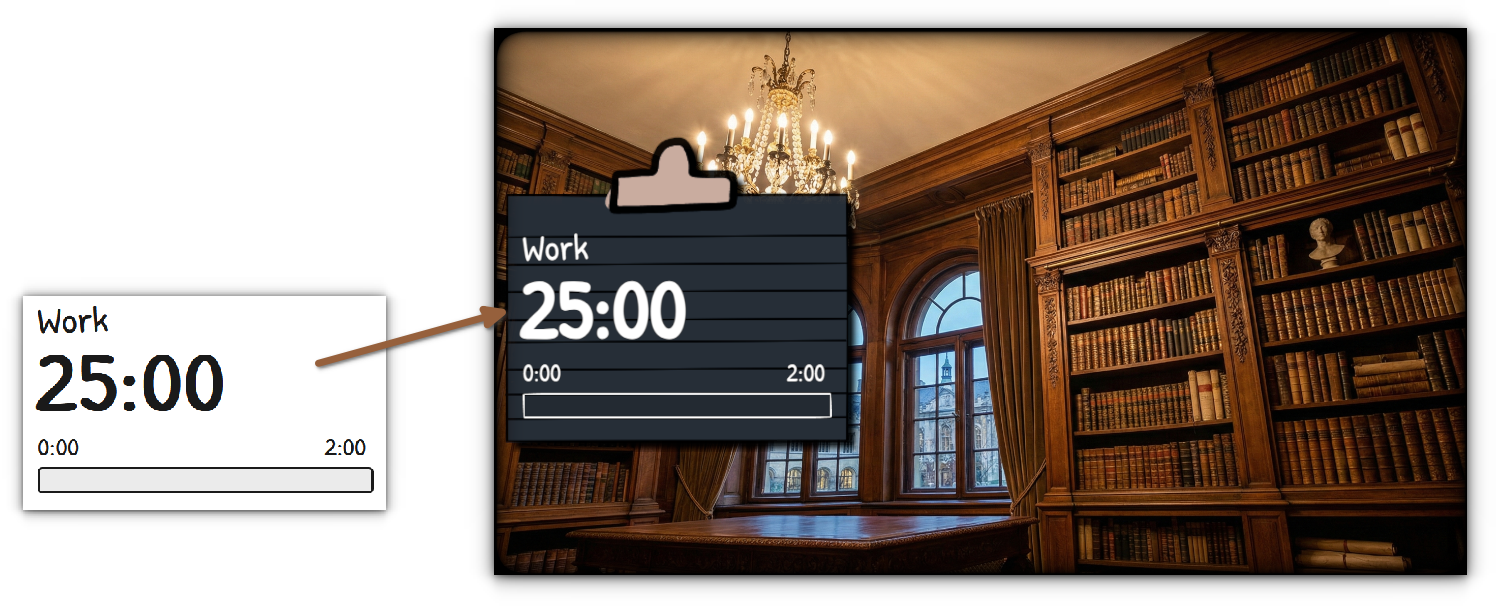 This is what the overlay looks like in your stream. On the left you see the pure overlay and on the right there is the way I like to decorate it so it fits my video stream.
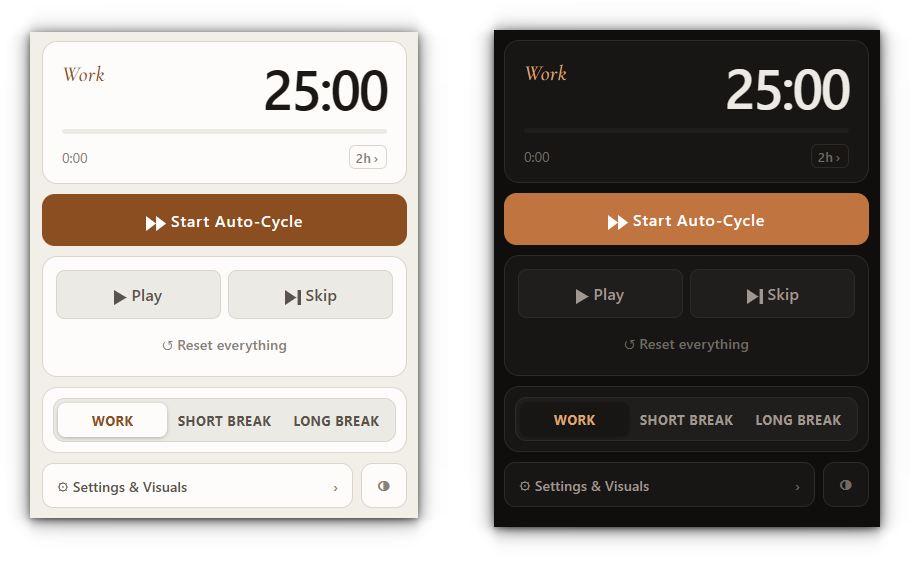
The controls run as a dock directly inside OBS. Light or Dark, depending on your setup.
Setting up OBS
Step 1: Install OBS
OBS runs on Windows, Mac, and Linux. Download it at https://obsproject.com and install it. Next, next, finish.
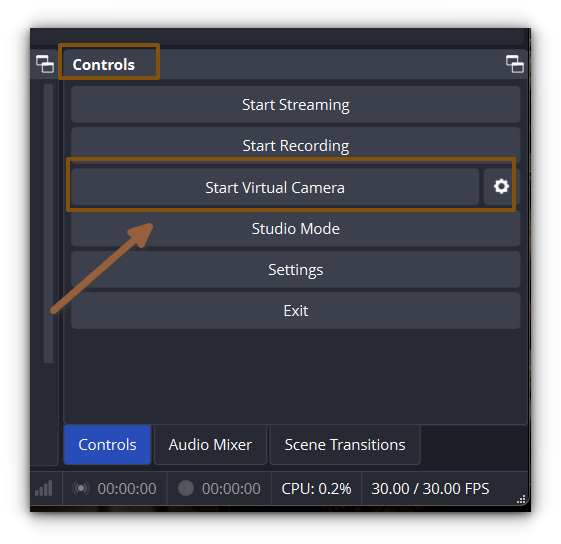
Stream setup (Twitch, YouTube, …) isn’t part of this post. I personally only use OBS as a Virtual Camera in Discord. That’s plenty for studying together.
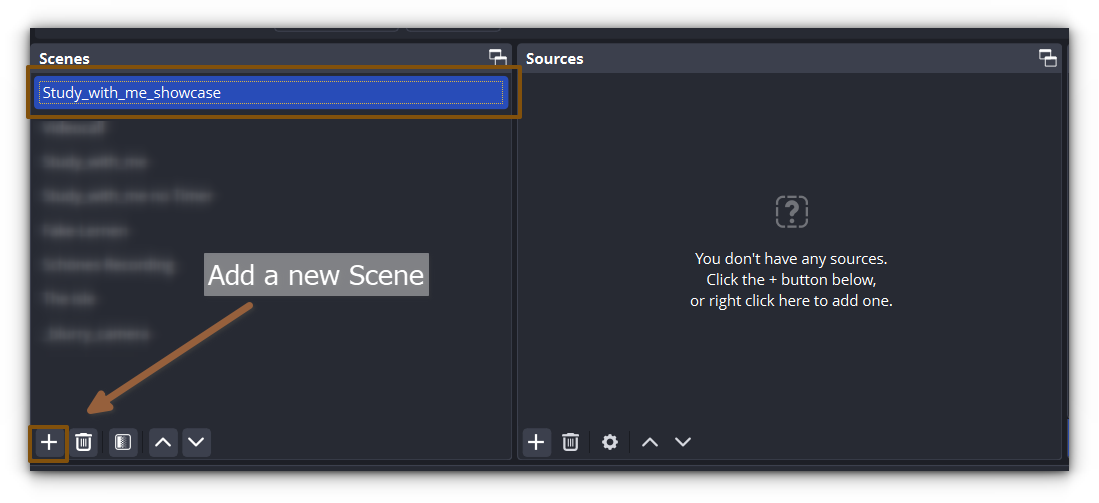
Step 2: Create your first Scene
Open OBS. In the bottom left you’ll see the Scenes panel, one is already created. Next to it is Sources. That’s where your webcam, background, and later the overlay go.
Add a source: + → Video Capture Device for your webcam. Optional: an image as background.
Step 3: Set up your Video Feed
In the Sources section of your newly created Scene add your camera via the + icon then Video Capture Device and selecting your camera.
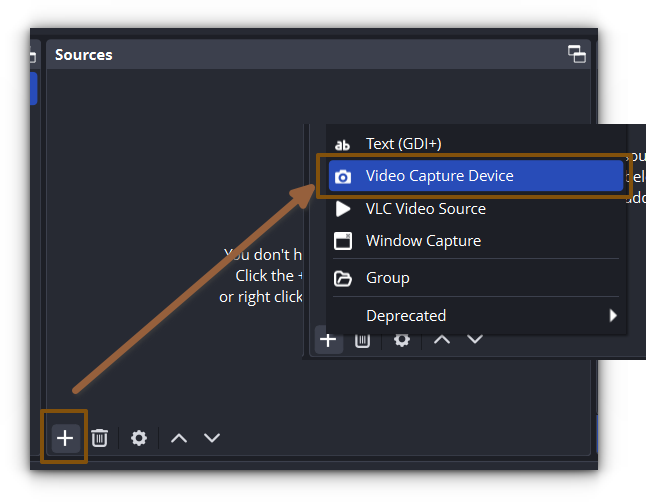
Now we have the baseline ready, you are able to share your Camera feed via OBS!
Adding Pomodoro to OBS
This is the core.
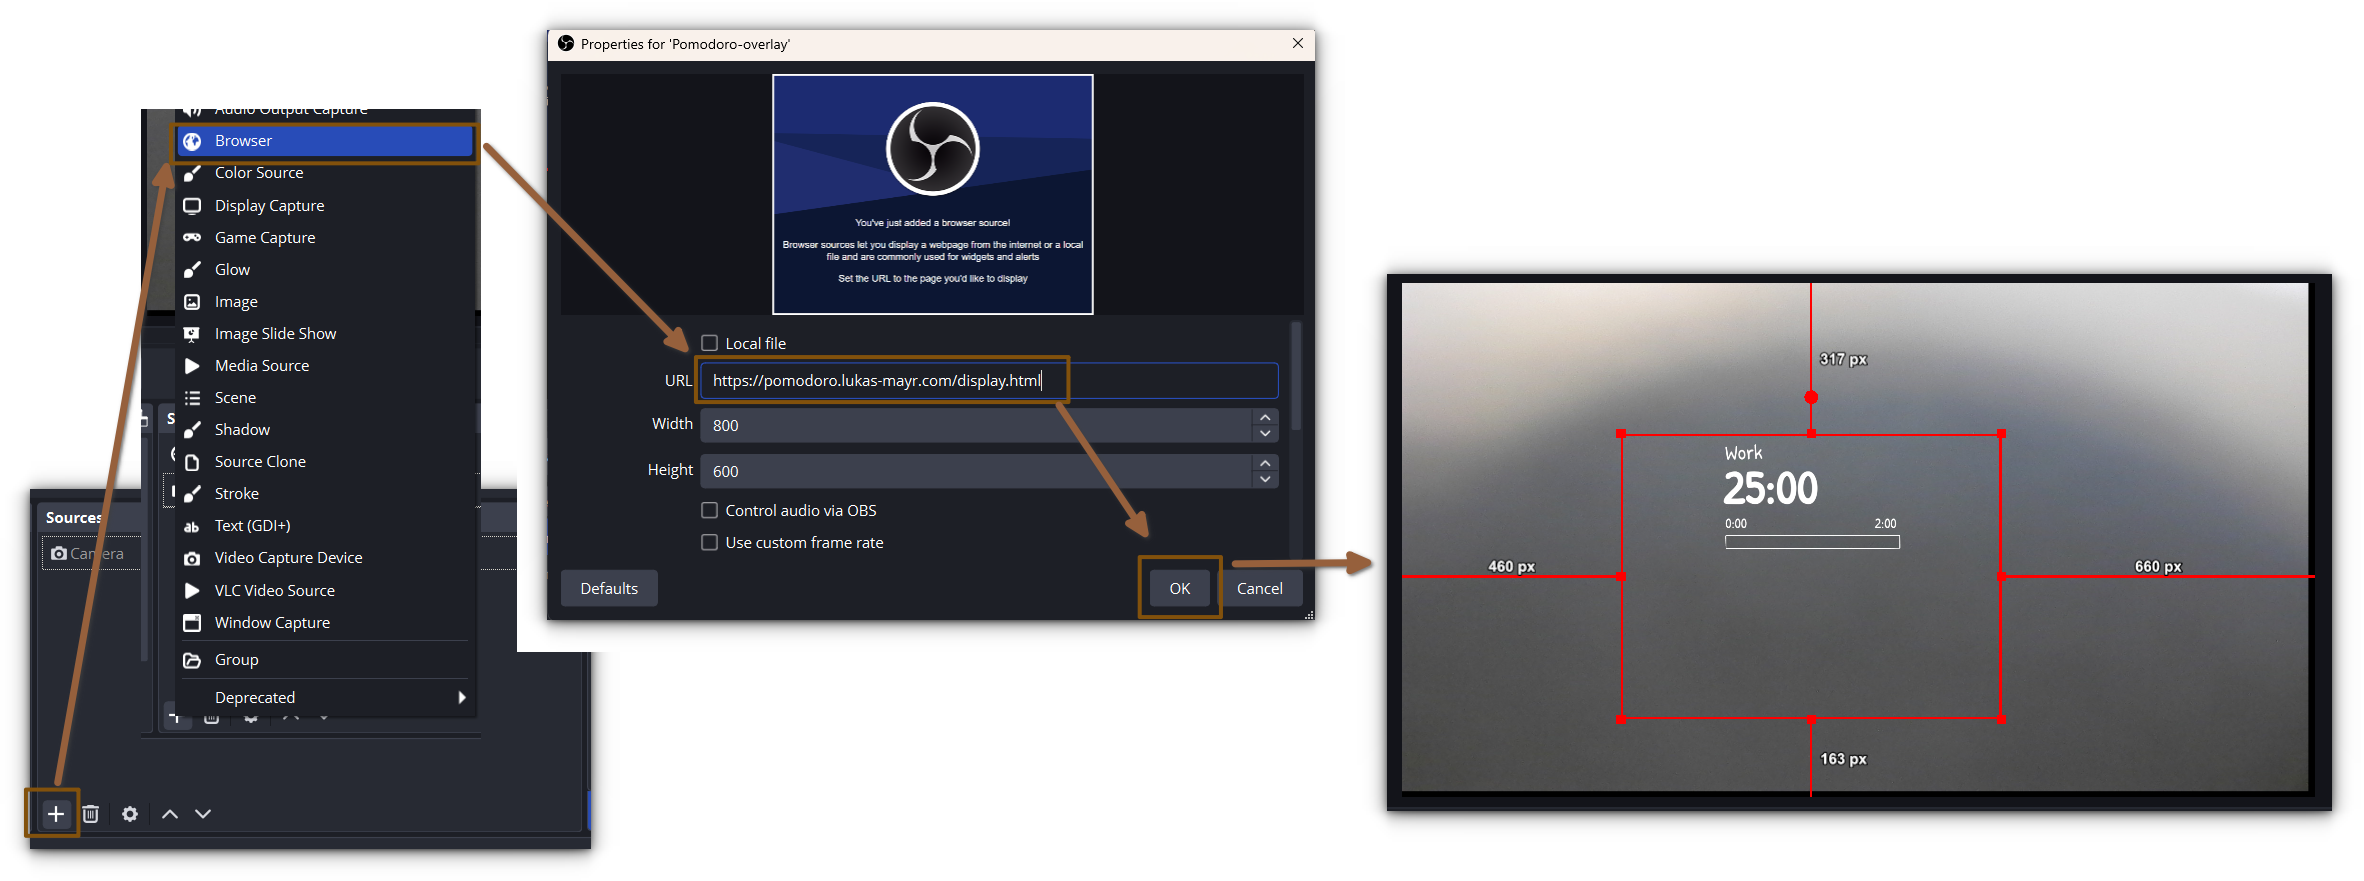
A. Overlay as a Browser Source
In OBS: + under Sources → Browser. Settings:
URL: https://pomodoro.lukas-mayr.com/display.html
You can resize it freely later.
B. Control as a Browser Dock
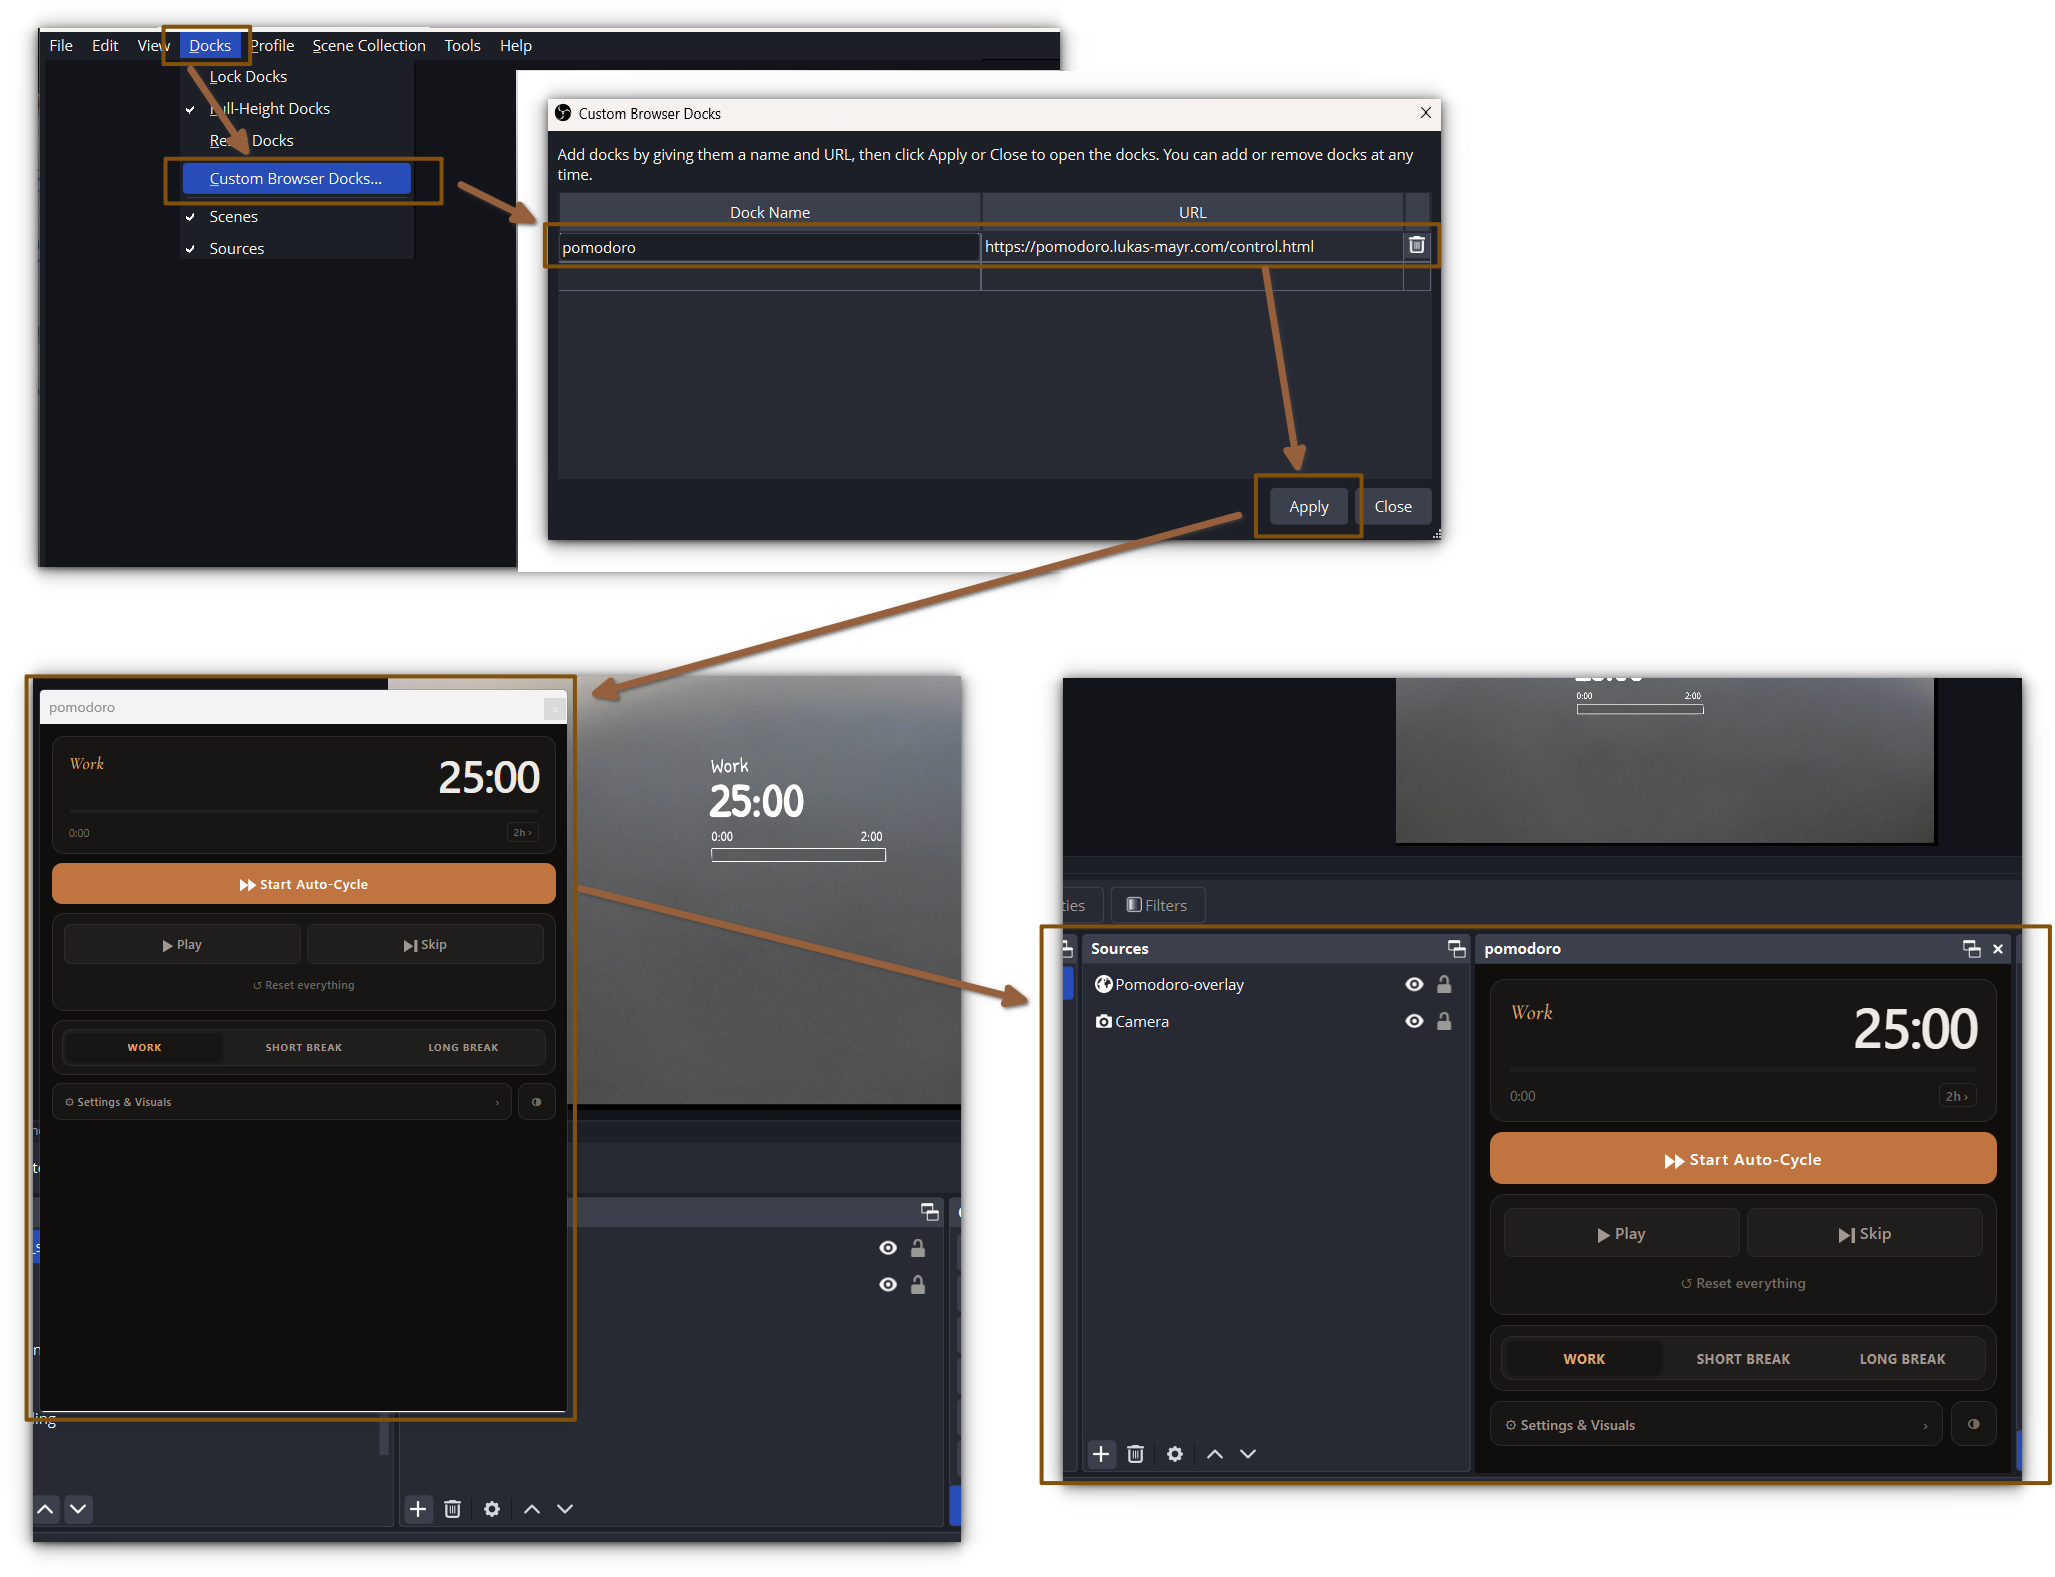
In the title bar you can go to Docks, Custom Browser Docks and add one with the following URL:
URL: https://pomodoro.lukas-mayr.com/control.html
Click Apply. The dock appears and you can move it or attach it wherever you want.
I prefer to drag it to the bottom so it’s there together with the other docks.
C. First Test
Click Start Auto-Cycle in the dock. The timer runs in the overlay and switches automatically between Work and Break.
That’s it.
Add some decoration
Since we now have a fully functional and manageable Pomodoro timer on our video feed. The next step is for me always to embed the timer properly in the frame.
You can change the appearance via the settings:
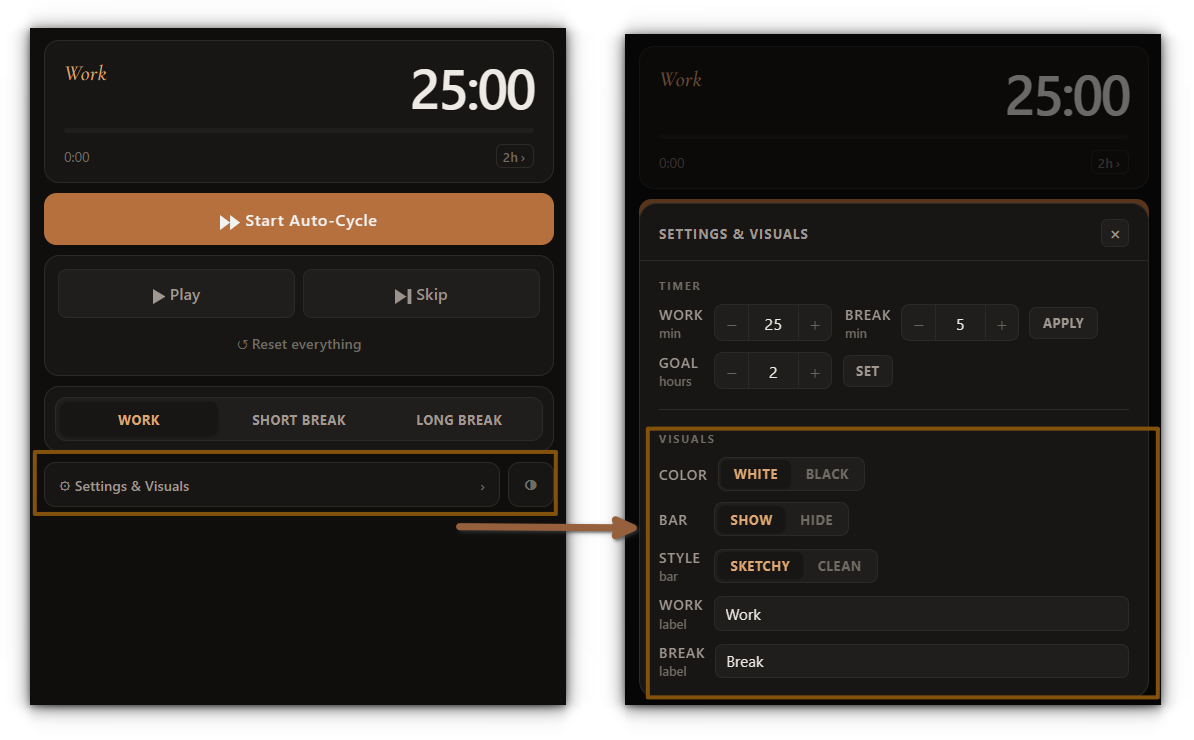
But I recommend to also have a nice image as background. For example I am using this hand drawn clipboard:
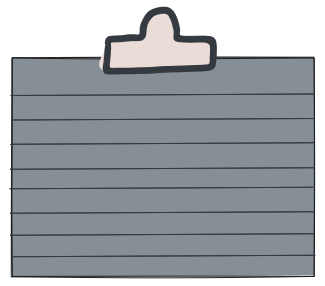
If you want to use mine you can download it here.
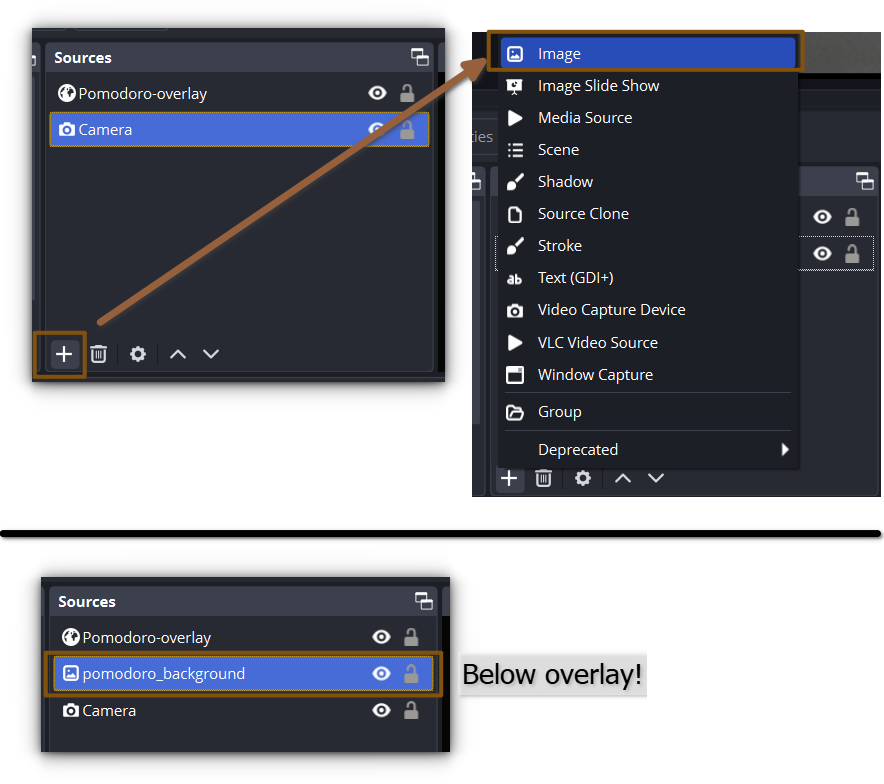
To insert this you can simply add a new source to your Scene and select any image on your system and place it below the Pomodoro timer overlay.
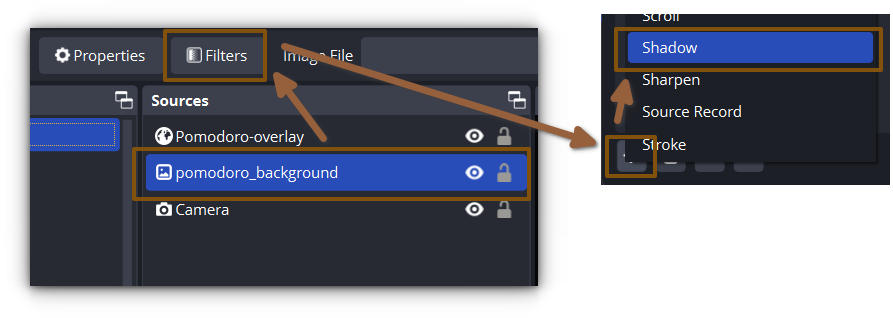
Tip: I also like to add a drop shadow to the image so it looks more like the timer and the background are placed on top of the video feed.
Features to adjust in the control dock
- Auto-Cycle between Work and Break
- Session goal with a live progress bar
- Adjustable Work/Break durations and custom labels (e.g. “Study” / “Tea”)
- Light and Dark theme
- Sketchy or Clean style
- Settings stay saved
If you want more, poke around the Settings & Visuals panel :)
Want to study together?
If this helps you, that makes me happy.
If you feel like studying with others, the Study Together Discord always has people online. I’m often in one of the voice channels myself. Feel free to ping me if the setup worked or you have questions.