I recently got to talk about the Model Context Protocol and about working with local open-weight models at the Software Developers Thursday at the NOI Techpark South Tyrol. The room was full of engaged developers, and I really enjoyed it. This post is meant as a companion to the talk. If you were there, I hope it gives you a few extra details to build on. If you couldn’t make it, I tried to explain everything at a pace you can follow along. Thanks for reading!
Goal of this Post
Local large language models (LLMs) have become good enough that you don’t need to be a full-time machine learning engineer to get real value out of them. Open-source tools like Ollama and Open WebUI let you run good models on your own machine, and the Model Context Protocol (MCP) connects such a local model to external data sources, tools and APIs. The idea of this post is to go through the whole path: setting up a local LLM environment, choosing a model that fits your hardware and your use case, and connecting it to the outside world with MCP. At the end you should have a local setup that you understand well enough to adapt and extend yourself.
Setup for Local LLM usage
Running LLMs locally means your data stays with you, there’s no network round trip, and the costs are predictable. For me, Ollama for hosting the models plus Open WebUI as the interface has turned out to be a good mix of simple and capable.
Ollama
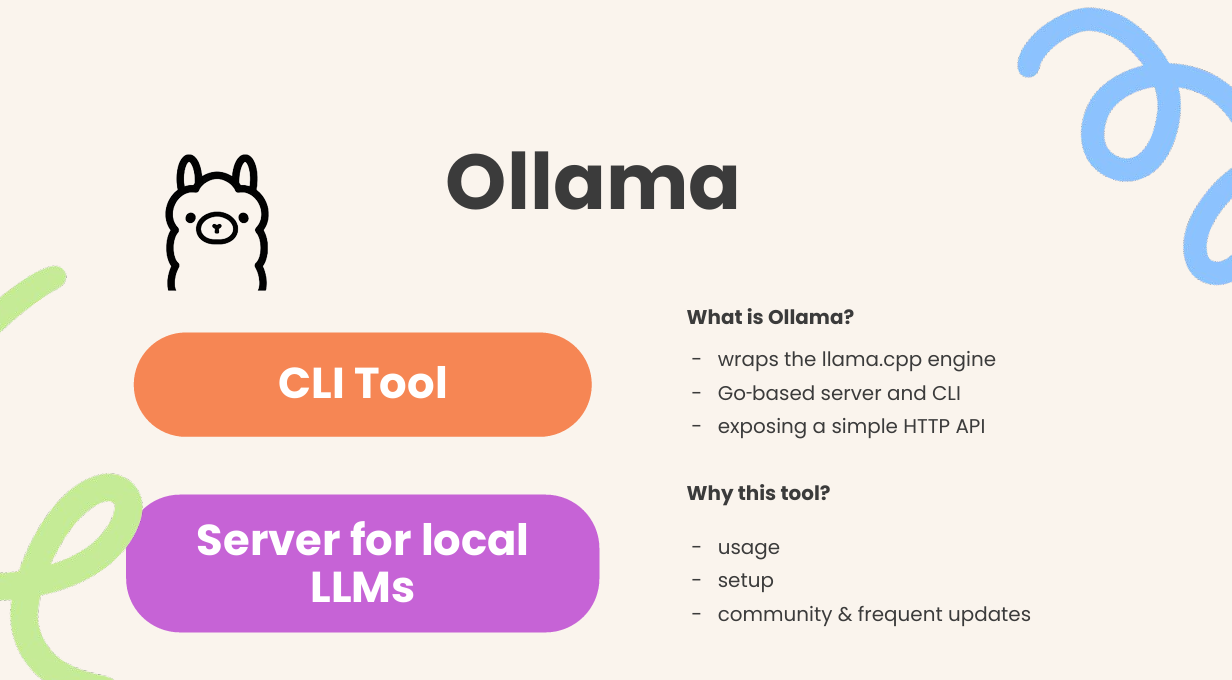
Ollama is a Go server and CLI around the fast llama.cpp inference engine, with a simple HTTP API on top. You don’t need to know any Go to install it. On Linux, the official site recommends a one-line install script:
curl -fsSL https://ollama.com/install.sh | shThe script downloads the latest release and sets up the ollama binary. If you’d rather install it by hand, download the .tgz archive from the release page, extract it to /usr/local and start the service yourself with ollama serve. For Windows and macOS there are packages on the website. Once installed, ollama serve starts an HTTP server in the background on port 11434, and commands like ollama run llama3.1 just send HTTP requests to it.
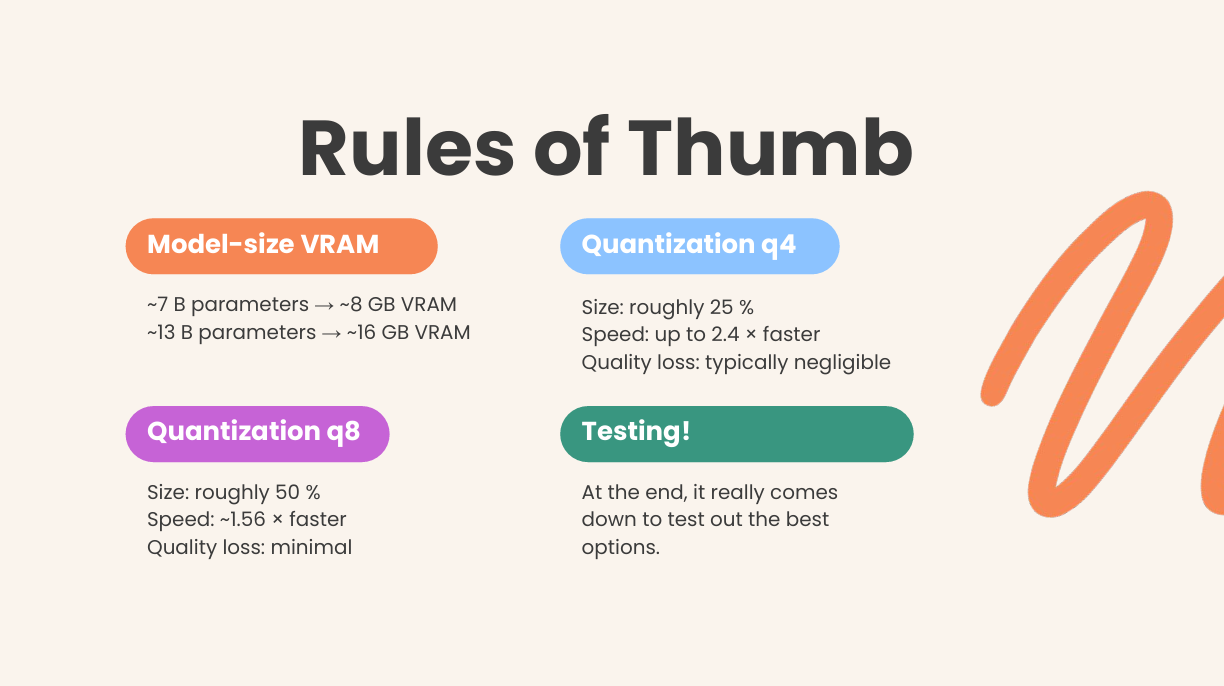
Ollama also provides ready-made model packages. As a rough guide, a 7-billion-parameter model needs at least 8 GB of RAM, and a 13-billion-parameter model about 16 GB.
On a GPU the same numbers apply to VRAM, so a card with 16 GB can run 7–13 B models, especially with the quantized builds Ollama offers (more on quantization below). The models are stored as GGUF files, a single-file format made for llama.cpp that also holds quantized weights. And since Ollama has a REST API, you can use it from scripts or other interfaces without learning a new protocol.
Another plus is the permissive MIT license. You may modify and redistribute Ollama as long as you keep the original license and copyright notice, which makes it easy to build into your own projects.
Why I like it: I’ve used Ollama since its early releases, and it has kept up with every big shift so far. When multimodal models came out, support was added quickly, and the same happened with new quantization formats. It keeps the complicated C/C++ inference away from you (all the low-level work happens in llama.cpp) without hiding what’s going on. In practice I installed it once, update it now and then, and the models just work.
Running the service
After installing, start the service in one terminal:
ollama serve
Then run a model from a second terminal or through the API:
ollama run llama3.1
Under the hood, ollama run sends an HTTP request to localhost:11434 and streams the answer back. Because the API is plain JSON over HTTP, it’s easy to write your own integrations or to put a web front end like Open WebUI in front of it.
Open WebUI
Open WebUI (formerly Ollama WebUI) is a web interface with a lot of features that runs on top of Ollama (and other OpenAI-compatible APIs). It’s built for developers who want something like ChatGPT, but locally. You can install it in several ways:
- pip installation: If you already have Python 3.11,
pip install open‑webuiinstalls the server andopen-webui servestarts it on port8080. Details here. - Docker: For an isolated setup, use
docker runwith the official image. By default it connects to a local Ollama instance. For example, to run Open WebUI with Ollama bundled in one container and the UI on port 3000:
The project documentation has alternative commands for GPU usage or for connecting to a remote Ollama server.docker run -d -p 3000:8080 -v ollama:/root/.ollama -v open-webui:/app/backend/data \ --name open-webui --restart always ghcr.io/open-webui/open-webui:ollama - Kubernetes and Helm: For more complex deployments there are official Helm charts and Kustomize manifests, see docs.openwebui.com.
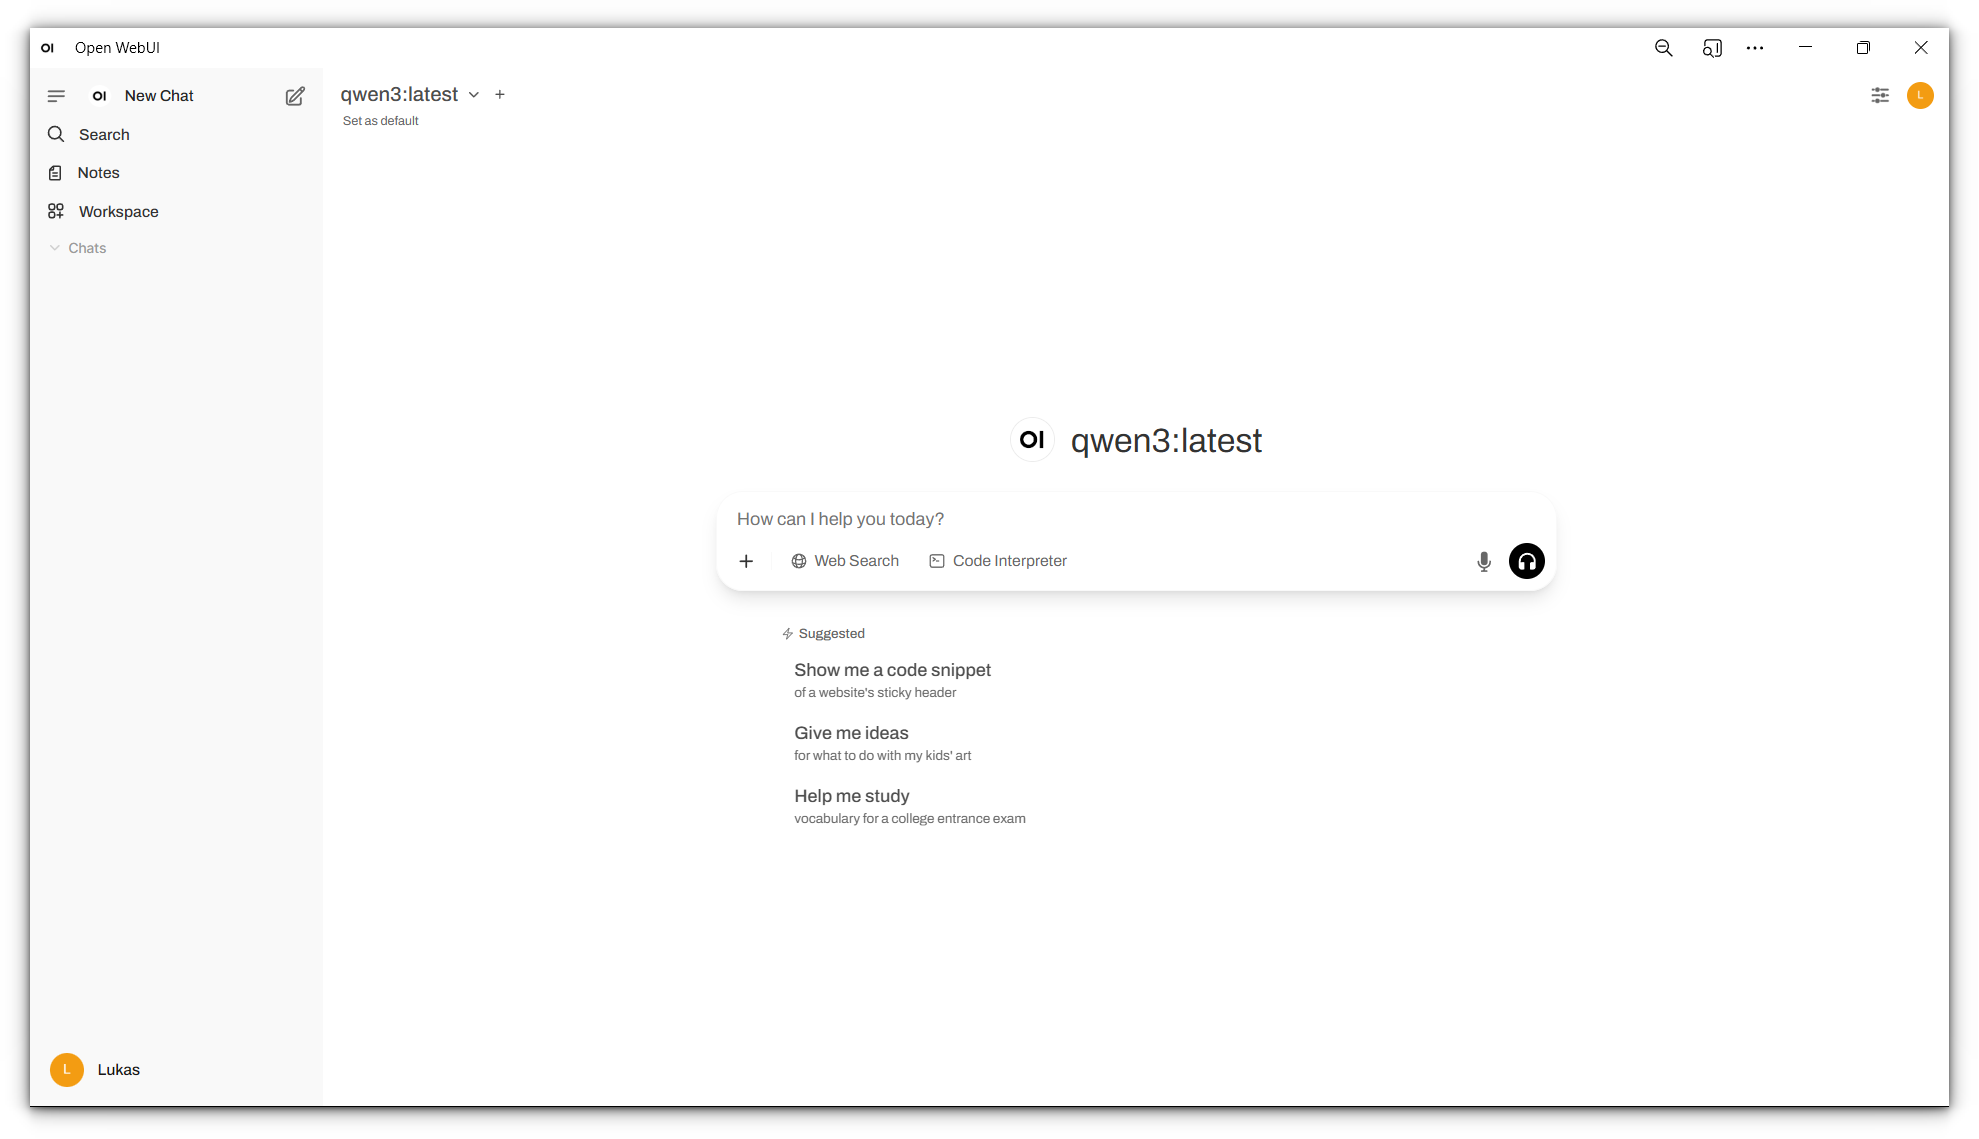
The first time you open the WebUI, you create an admin account. It finds a running Ollama service on its own and lists the available models. If that doesn’t work, go to Admin Settings → Connections → Ollama and enter the base URL (for example http://localhost:11434).
Key features
According to the official documentation, Open WebUI is meant to be more than a chat window. A few highlights:
-
Unified workspace: Models, prompts, documents and tools all live in one interface. You can sort conversations into folders and tag them, and a folder can have its own system prompt and knowledge base, so every chat you start in it gets that context.
-
Prompt templates: In the Prompts section you can save reusable prompts and call them with slash commands. They can use system variables (current date, user name, etc.) and your own input variables, which open a small form when you use the prompt. That makes structured workflows like “/summarize” or “/draft‑email” easy to set up.
-
Chat history management: You can look through earlier regenerations, archive old chats, export conversations as JSON, PDF or TXT, import or export your whole history, or delete everything and start fresh. So you stay in control of your conversation data.
-
Document and web integration: Retrieval-Augmented Generation (RAG) is built in. You upload PDFs and other documents and reference them in a chat by typing
#documentName. There’s also a web search that fetches pages when needed, plus image generation, voice input and video calls. -
Pipelines and tools: Open WebUI has a plugin framework for pipelines. You upload Python scripts that run inside the UI and offer functions to your model, similar to OpenAI function calling. In this post I connect tools a different way, through MCP (see below).
Unlike Ollama, Open WebUI is not MIT licensed. It uses a BSD-3-style license with extra branding rules: you may redistribute and modify it, but you can’t remove or change the “Open WebUI” branding unless you have fewer than 50 users or get permission. Worth knowing if you plan to white-label the interface.
Why use Open WebUI?
You can talk to Ollama with curl or your own scripts, but a web UI makes daily use a lot easier: chat history, organized conversations, RAG, voice and video, and, most important for this post, MCP tools through a small proxy (more on that later). Open WebUI is where I do most of my local LLM experiments.
Find the best model for a use‑case
Picking a model shouldn’t mean taking whatever a blog post currently recommends (this one included). It’s better to look at solid evaluations and to match the model’s requirements to your hardware.
Use leaderboards to assess quality
Chatbot Arena and similar leaderboards rank open LLMs using crowdsourced votes and benchmark scores. The Big Benchmarks Collection on Hugging Face collects several of these ranking tables, each with its own metric. Some common ones:
- Chatbot Arena: A tournament with humans in the loop. Models compete in blind A/B tests, and the votes become Elo ratings.
- MT‑Bench: Multi-turn conversation tasks, graded automatically by GPT‑4, with a focus on chat quality.
- MMLU (5‑shot): Multiple-choice questions from 57 subjects that test broad knowledge.
When you evaluate a model for your own use case:
- Filter by model size and hardware. A 7 B model usually fits into 8 GB of RAM, a 13 B model needs around 16 GB. Many consumer GPUs have 16 GB of VRAM, so the 7 B–13 B range or quantized versions are a good place to start.
- Look at the individual metrics. A higher Arena Elo means better perceived chat quality, MT‑Bench focuses on staying coherent over several turns, and MMLU measures factual knowledge. Which one matters depends on your task (coding, summarization, Q&A), so don’t decide on the overall rank alone.
- Check the license and the community. Some models restrict commercial use, others like Llama 3 have a permissive license. Look at the repository and the license file before you commit to one.
- Stay up to date. Open-source LLMs move fast, and the best models of early 2024 are probably not the best ones in mid-2025. Check the current leaderboard.
- Test your favourites. In the end the model has to fit your use case, and benchmarks are often only a hint. So you’ll want to pull a few candidates through Ollama and try them yourself.
Quantization: fitting big models into small hardware
Most consumer GPUs can’t load a 70 B model at full precision. Quantization stores each parameter with fewer bits, so large models fit into memory with only a small loss in quality. A 4-bit model needs a quarter of the memory of its FP16 version. A broad evaluation by Jin et al. found that 4-bit models keep performance comparable to the original (arXiv 2402.16775). The same paper points out that quantization alone can make inference slower: you only get the speedup when the inference engine has optimised kernels for the format. With those, the gains are real, for example with AWQ (Activation-aware Weight Quantization) and SmoothQuant:
- Converting a model to 4-bit shrinks it by about 75 % and can make inference up to 2.4× faster (Latitude).
- AWQ stores weights in 4 bits (a quarter of the FP16 memory), and its TinyChat runtime is more than 3× faster than the FP16 Hugging Face implementation, with hardly any loss in accuracy (arXiv 2306.00978).
- SmoothQuant’s 8-bit quantization halves memory use and is up to 1.56× faster (arXiv 2211.10438).
- For newer models like DeepSeek R1, a 2025 report found that 4-bit versions lose only a little quality compared to FP8, while fitting on a single machine (arXiv 2505.02390). In general, INT8 makes a model about 2× smaller than FP16 and INT4 about 4× smaller.
Ollama has pre-quantized versions of many models, so the model you pull is probably already quantized. If you want a specific quantization, look at the model’s page: the tag usually contains a qX, where X is the number of bits. For a local setup I’d start with a 4-bit or 8-bit model and check whether the quality is good enough.
Putting it all together
Say I want a model that summarises articles on a 16 GB GPU. I would:
- Check the leaderboards from above (Chatbot Arena and the Big Benchmarks Collection) for 7 B–13 B models that do well on Arena and MT‑Bench, as a rough signal for general chat quality.
- Pull a quantized version through Ollama and try it on a few documents in Open WebUI.
- Compare the answers with a second model (maybe a 13 B one if memory allows), using Open WebUI’s Model Evaluation Arena or simple A/B tests in separate chats.
- Weigh quality against speed. If the 13 B model is clearly better but too slow, try a different quantization method (AWQ vs. SmoothQuant) or a smaller model with better instruction tuning. That’s the nice thing about local LLMs: you can try things out quickly.
MCP
Anthropic announced the Model Context Protocol (MCP) in November 2024. The problem it addresses: language models understand natural-language requests, but without custom integrations they can’t see your files, call APIs or control applications. MCP is an open standard for connecting AI applications to external data sources and tools, a bit like USB-C connecting devices to peripherals. Every MCP connection involves three roles:
- MCP host: the AI application (e.g. Claude Desktop, VS Code or a chatbot like our Open WebUI instance) that manages one or more MCP clients.
- MCP client: a component inside the host that keeps the connection to one MCP server.
- MCP server: a program that offers data and functionality (tools, resources and prompts) to clients.
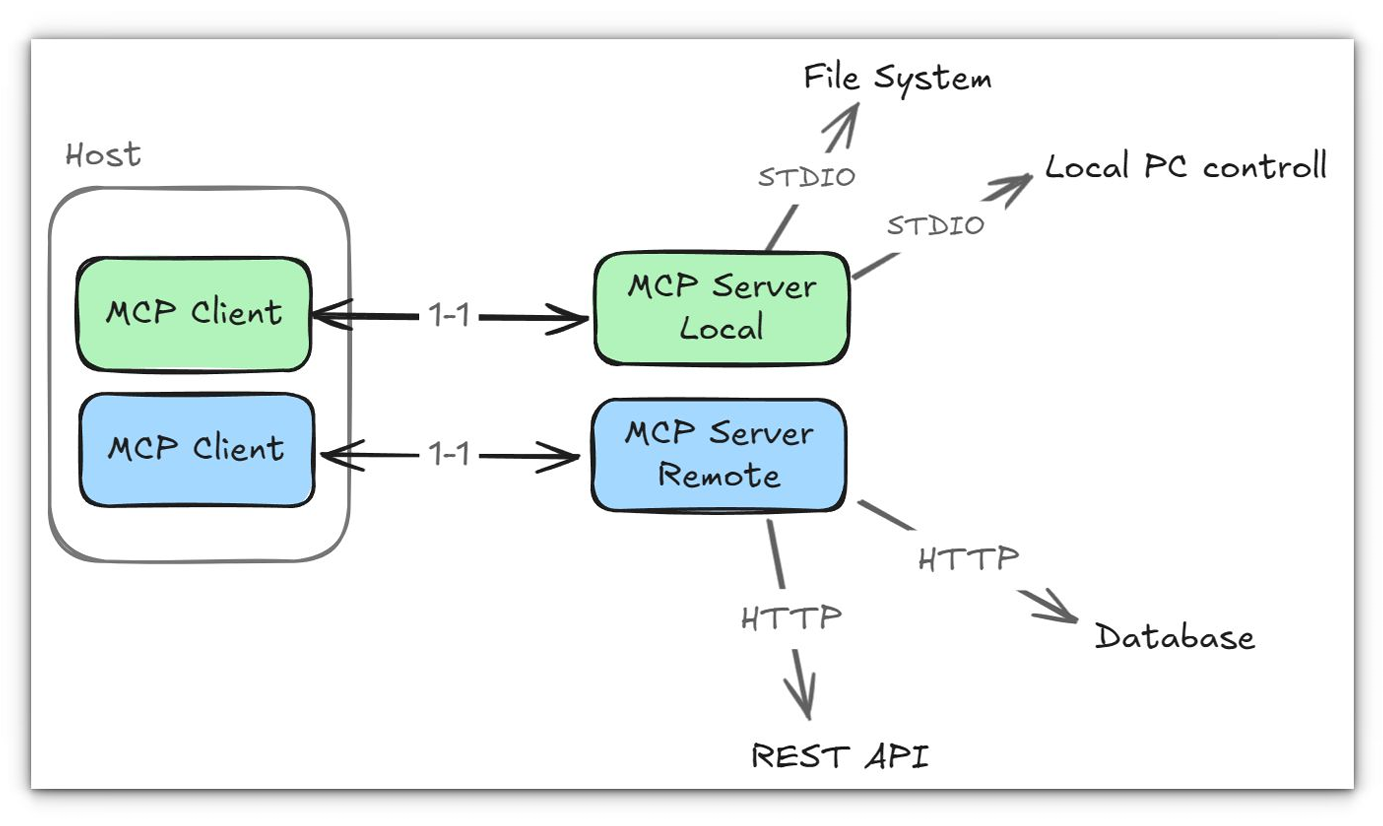
This client-server setup is split into two layers:
-
Data layer: defines the JSON-RPC 2.0 protocol for requests and responses (modelcontextprotocol.io). It standardises lifecycle management, capability negotiation and the core primitives: tools, resources and prompts. It has methods for discovery (
*/list), retrieval (*/get,resources/read), execution (tools/call) and notifications. -
Transport layer: defines how client and server talk to each other. MCP supports two transports: stdio (both directions over the process’s standard input and output) and streamable HTTP, which uses HTTP POST and server-sent events so servers can also run remotely (modelcontextprotocol.io). In an
initializehandshake both sides exchange the protocol version, the capabilities they support and some information about themselves.
MCP primitives
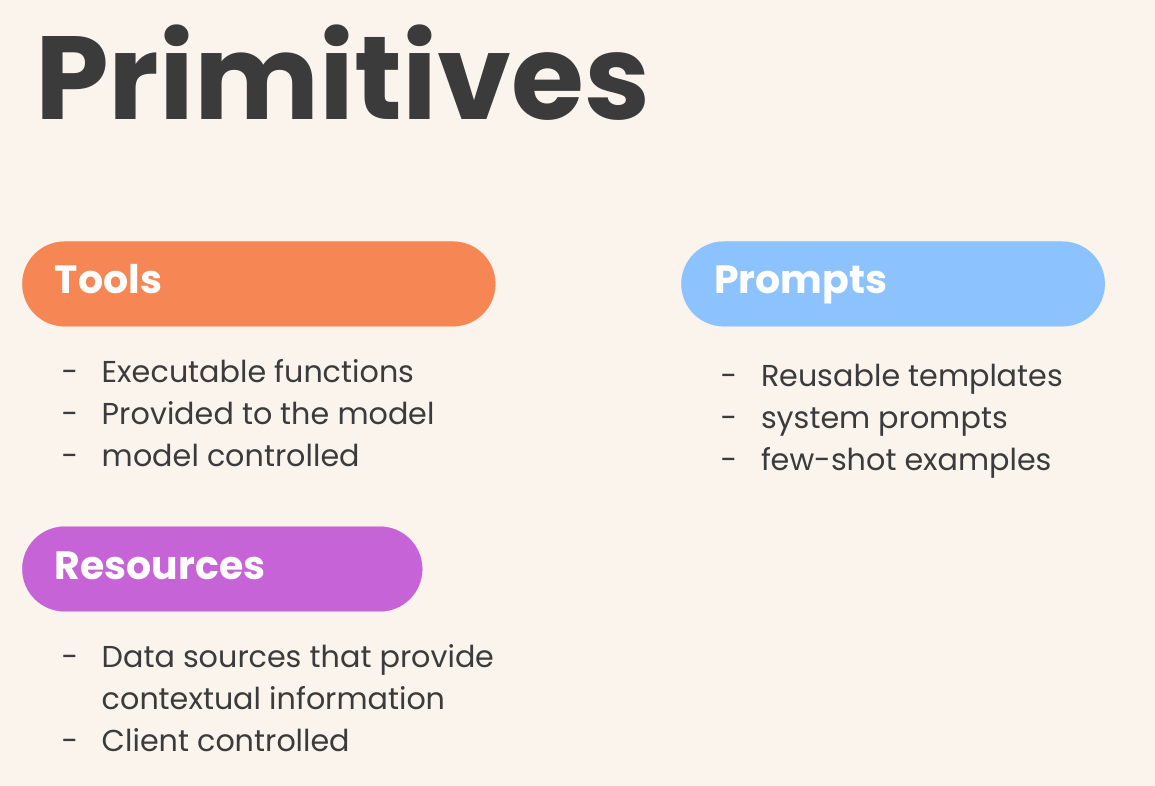
MCP servers offer their functionality through three primitives:
-
Tools: Functions the language model can call to do something, like searching for flights, creating calendar events or calling APIs. Each tool has a name, a human-readable description (which is also what the model reads to decide when to use it) and an input schema. Clients find tools with
tools/listand run them withtools/call. The specification puts a lot of weight on keeping a human in the loop: applications should show which tools are available and ask for explicit confirmation before running one. -
Resources: Data sources the host can read and pass to the model. Resources have URIs and MIME types, and servers offer them via
resources/listandresources/read(modelcontextprotocol.io). Resource templates allow parameterised access to structured data (e.g.travel://activities/{city}/{category}). -
Prompts: Reusable templates that give interactions with the model a structure. They can contain system prompts, few-shot examples or domain-specific instructions. Clients list and fetch them the same way as tools and resources.
It also works the other way round: MCP clients can offer primitives to servers. With sampling, a server can ask the host’s model for a completion (handy if the server has no LLM of its own). With elicitation, a server can ask the user for more input; the client shows the request and lets the user accept or decline it. Logging sends structured log messages to help with debugging.
Lifecycle example
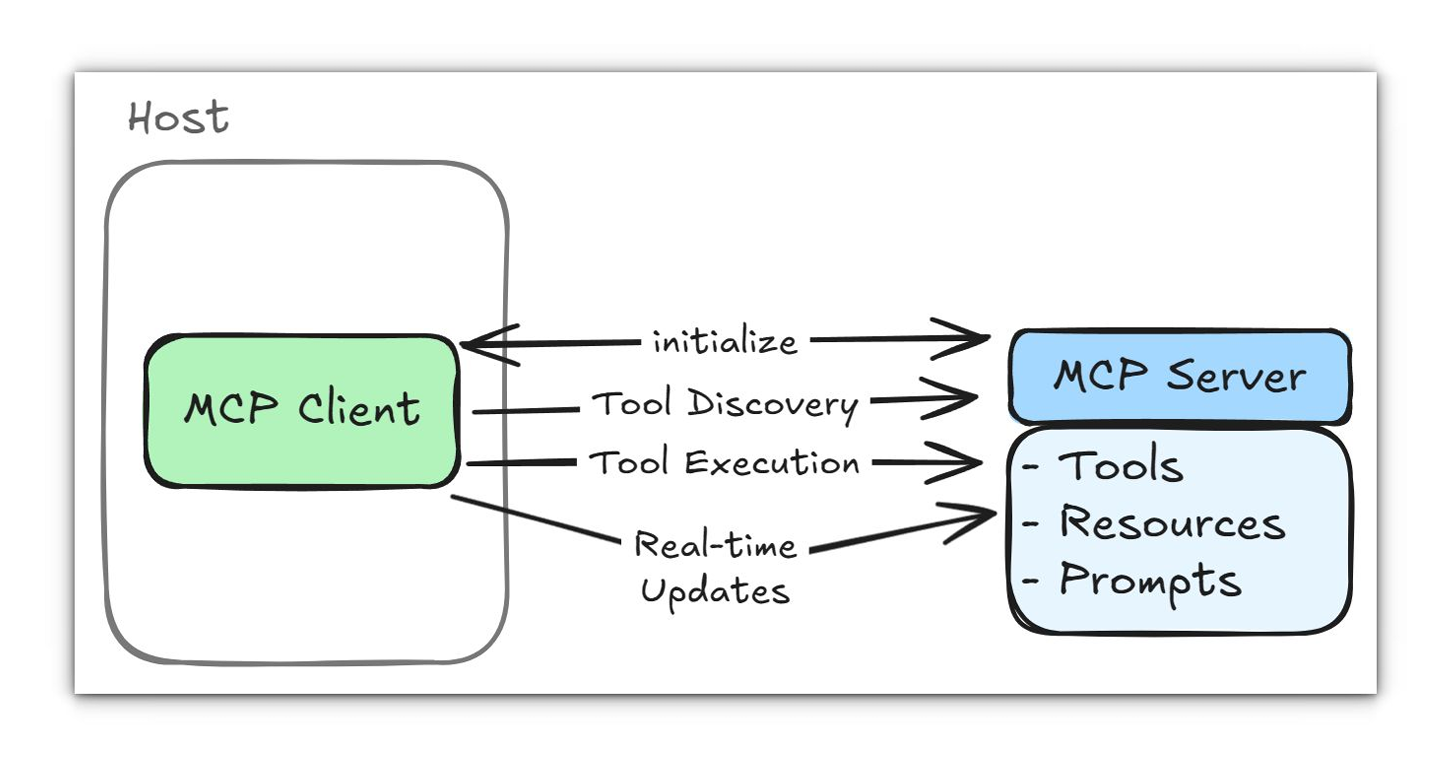
A typical session starts with the host creating an MCP client for a server. The client sends an initialize message with the protocol version, its capabilities and client info. The server answers with its own capabilities and then sends a notifications/initialized notification. After that, the client can list the tools:
{ "jsonrpc": "2.0", "id": 1, "method": "tools/list" }The server returns a list of its tools, each with a name, description and input schema. When the model decides a tool would help, the host sends tools/call with the tool name and arguments. The server runs the operation (often only after the user approves it) and sends back a structured result.
So MCP is a general bridge: it hides the transport details and gives AI models a structured view of what’s available outside. The spec itself calls it “a standardized way to connect AI models to different data sources and tools”.
Host & Connect to external MCP server
Running an MCP server is only half of it, you also need a host application that can talk to it. Open WebUI supports tool servers in the OpenAPI format. Since most MCP servers talk over stdio or streamable HTTP, the Open WebUI team built mcpo. It’s a proxy that wraps an MCP server and offers it as a REST-style OpenAPI service. That solves a few problems at once: stdio only works locally and isn’t safe over a network, and plain MCP has no API documentation or authentication. mcpo generates the OpenAPI docs for you, adds HTTP authentication and puts each tool call behind its own secured HTTP endpoint. All the details are here: docs.openwebui.com.
Running mcpo
To make an MCP server available over HTTP, install mcpo (uvx mcpo or pip install mcpo) and start it together with your server command. For a time server written in Python, for example:
uvx mcpo --port 8000 -- uvx mcp-server-time --local-timezone=Europe/Berlinmcpo starts the MCP server and serves the OpenAPI documentation at http://localhost:8000/docs. It can also proxy remote servers that use streamable HTTP, if you give it the server type and URL. With a config file you can serve several MCP servers under different paths, each mounted on its own route (for example /time or /memory).
Connecting to Open WebUI

Once mcpo is running, add it to Open WebUI in the settings. Under ➕ Tools, enter the full URL of a tool path, e.g. http://localhost:8000/time. Open WebUI separates User Tool Servers (the request comes from your browser) and Global Tool Servers (the request comes from the backend). If the MCP server runs on your own machine, use a User Tool Server: the connection stays private and localhost addresses work. If you host a tool for several users, use a Global Tool Server and make sure the backend can reach it. Keep in mind that every tool route has to be added on its own. Adding just the root URL won’t work, because mcpo puts each tool on a separate path.
In my experience, mcpo plus Open WebUI makes connecting external MCP servers really easy. You start the proxy, paste the URL into the Open WebUI settings, and the tool shows up in your chat, with generated documentation. For remote servers, check that the host and authentication headers are set correctly; mcpo supports bearer tokens and custom headers for streamable-HTTP servers.
Develop own MCP server + Tools / Resources
Building an MCP server is less about infrastructure and more about how well you describe the functions you offer. The official Python SDK (maintained by the ModelContextProtocol organisation) has a FastMCP class that makes creating a server simple. There are SDKs for all the other major languages too.
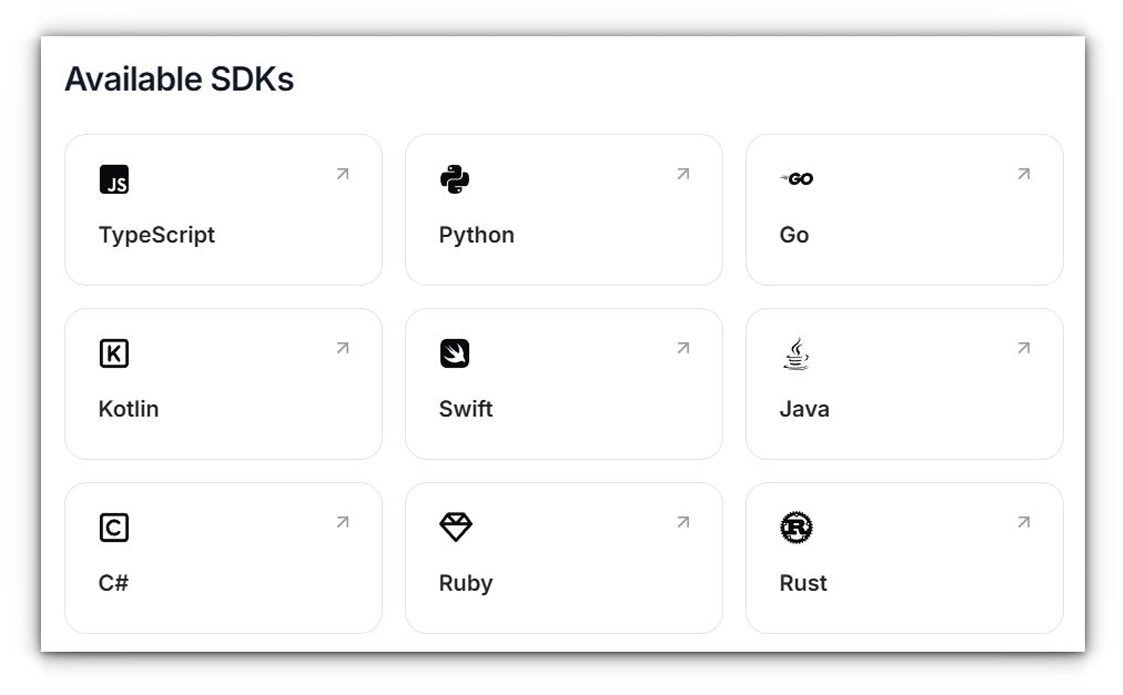
Everything about building your own MCP server is in the official docs: Build an MCP Server - Model Context Protocol. For me, the SDK repositories were even more useful, because they were the quickest way to get a server running. Since I work in Python, this was the page I used most: modelcontextprotocol/python-sdk
To give you an idea of what this looks like, I built a small server that helped me with my presentation :) The idea: I talk to the connected LLM, and through MCP it understands that it should press the “n” key to go to the next slide.
from mcp.server.fastmcp import FastMCP
from pynput.keyboard import Key, Controller
import time

# Initialize the FastMCP server
mcp = FastMCP("LazyPresentator")

# Create a keyboard controller instance
keyboard = Controller()

@mcp.tool()
def press_n_key(delay_seconds: int = 5) -> str:
    """
    For lazy presentators: Automatically presses the 'n' key to advance to the next slide
    after a specified delay.

    This is perfect for presentators who are too lazy to press the 'n' key themselves.
    The default delay gives you time to finish speaking before advancing.

    Args:
        delay_seconds: Number of seconds to wait before pressing the 'n' key (default: 5)

    Returns:
        A confirmation message about the slide advancement.
    """
    try:
        # Press and release the 'n' key
        time.sleep(delay_seconds)
        keyboard.press('n')
        keyboard.release('n')

        # Add a small delay to ensure the keypress is registered
        time.sleep(0.1)

        return "Successfully pressed the 'n' key. The presentation should now show the next slide."

    except Exception as e:
        return f"Error pressing 'n' key: {str(e)}"


if __name__ == "__main__":
    mcp.run()
Now we can start it with:
mcpo --port 8000 -- python .\lazy_presentator.pyIn your terminal you should see something like this:

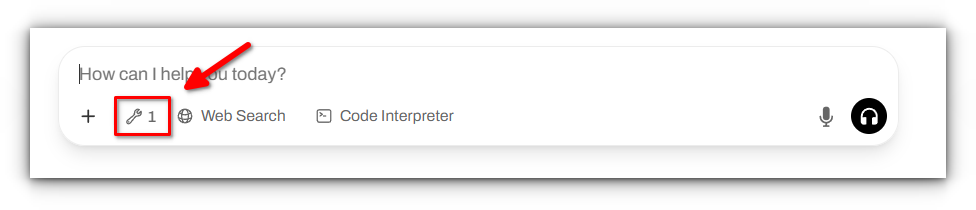
Once it’s connected to your Open WebUI instance as described above, this symbol shows that the connection to the MCP server works and the tools are available:
Now we can try out the tool we just built:
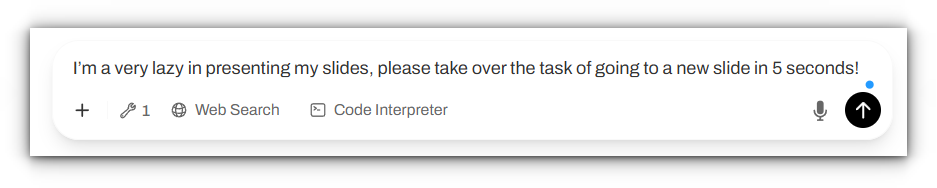
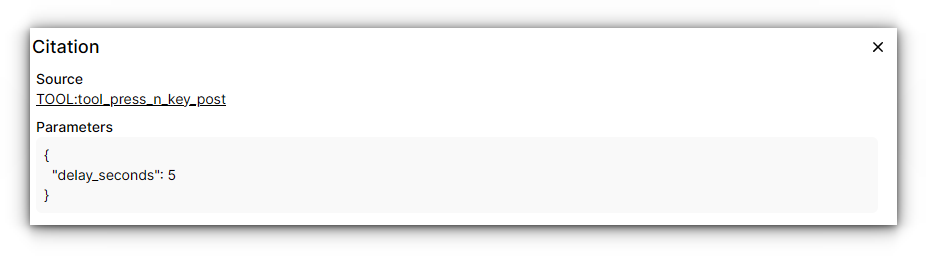
To check whether the tool was called with the right parameters, click on the text “TOOL:tool_press_n_key_post” in the model’s reply. It shows the task, executed correctly:
What to focus on when developing your MCP tools
Setting up an MCP server is technically easy. Making it actually useful for a language model takes a different kind of work. Most of it goes into the clarity and quality of the tool descriptions, much less into the server code. LLMs, and small local models even more, don’t guess what you meant. They match the user’s request against the text in your tool’s docstring. Here’s what helps to avoid the usual problems.
1. The Art of the Tool Description ✍️
For the model, your tool’s docstring is the main prompt it gets, so it has to be explicit, complete and unambiguous. A tool with a poor description won’t get used, however useful it is.
- Say what the tool is for. A name isn’t enough, explain what it achieves. Instead of
"""Manages files.""", write"""Creates, deletes, or modifies files on the local filesystem. Use this tool when a user wants to write text to a new file or edit an existing one.""" - Describe every parameter. Say what each argument is, its type (e.g. string, integer) and its format, and mention default values. For example:
Args: filename (str): The full path to the file to be created. content (str): The text content to write into the file. - Give concrete examples. The best way to guide the model is to show it when the tool should be used, which helps it recognise what the user wants. You can put this right into the description:
For example, if the user says 'save this summary to a file named report.txt', this is the right tool to use.
Treat it as prompt engineering in small iterations. Your first description will probably not be good enough. Test it, watch where the model gets it wrong, and improve the description until those gaps are covered.
In the end, the model is the user of your tool, and the docstring is most of what it gets to read.
Some thoughts on the ecosystem of MCP
MCP has spread quickly since it came out, and I think it’s on its way to becoming a basic standard for AI applications. What makes it strong is that tools and AI hosts can be combined freely, so you don’t need a new custom integration for every pairing. The MCP docs themselves compare it to a USB-C port for AI applications.
Who is Adopting MCP?
Here are some of the products and projects that already use it.
- AI Hosts: The applications people use every day are what drives MCP. Besides Open WebUI, which can use MCP tools through mcpo, there’s Anthropic, who introduced the protocol for its Claude models. AI-first development environments like Cursor use similar ideas to connect models to your codebase, and I expect native support in more IDEs and operating systems.
- Tool Providers (Servers): This is where I see the most activity, and it’s no longer only early adopters. The biggest effect so far is in infrastructure and data platforms. HashiCorp, for example, released an official MCP provider for Terraform. With it, a model can take a request like “provision a new staging environment with two web servers and a load balancer”, generate the matching infrastructure plan and apply it. A human checks along the way. Because the protocol expects user confirmation, this is a safe way to hand off complex DevOps tasks.
- Developer and Data Ecosystems: The community has quickly built MCP servers for the developer tools everyone uses. There are popular open-source MCP wrappers for the GitHub Actions API, so an AI assistant can report failing CI/CD pipelines or start a deployment. On the data side, platforms like Snowflake have added native MCP integrations. Analysts can then ask something like “Generate a report of Q2 customer acquisition costs grouped by marketing channel”, and the model turns it into an SQL query, runs it and summarises the result. To me these examples show MCP becoming the standard layer between what people want and complex digital systems.
Why It’s Time to Get Onboard
For developers, I think MCP is worth a look. Instead of building your own web interface or plugin system for your application, you can offer its functionality through an MCP server. That has a few advantages:
- Future-Proofing: Because MCP is an open standard, your application works with any AI host that supports it.
- Increased Reach: Users can add your tool to whatever AI workspace they prefer, whether that’s Open WebUI, a VS Code extension or another host. You provide the capability, they pick the interface.
- Focus on Core Logic: You don’t have to build and maintain a UI for every possible action. You can focus on what your application does best and offer that through well-described tools.
The ecosystem is still young, and a lot can still change. From what I’ve seen so far, though, I think MCP has a good chance of becoming the standard way for AI models to work with the outside world safely. If you’re curious, now is a good time to try it, for example with a small server like the one above.