Some time ago my father showed me our family coat of arms (I’ll just call it the crest here). He and some of his siblings have signet rings with it.
I’ve gotten into writing letters lately. I like experimenting with fountain pens and dip pens, and the whole topic is just really interesting to me right now. So I thought it would be cool to have the crest on my letters too, as a wax seal. A bit old-fashioned, I know, but I like it.
I have a 3D printer I can use, so the plan was to print the seal myself. But all I had was one photo of the impression the rings were made from.
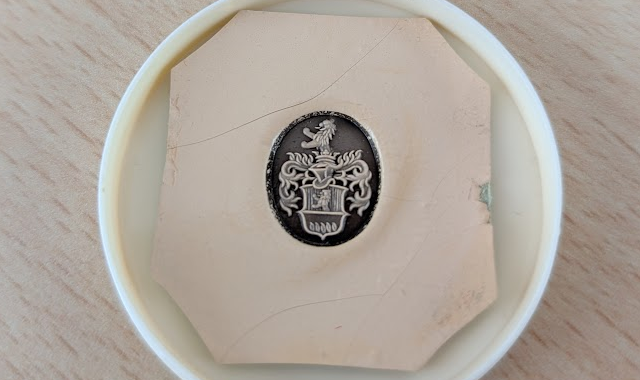
What I needed
To print a seal, a picture isn’t enough. I need a relief, a surface where every point has a real height.
That reminded me of Visual Computing, a lecture from my computer science bachelor at the University of Innsbruck. It had a part on the basics of 3D graphics, and one thing we learned about there were depth maps. A depth map is a 2D image of a scene where every pixel stores how far that point is from the camera. The brighter the pixel, the closer the point. So it’s basically a black-and-white image with all the height information of a scene, seen from the camera. In this context it’s usually called a heightmap: white is high, black is low.
The hard part is getting a good one from a single photo. If you compute it directly from the image, you get a lot of noise, and the overall structure of the crest gets lost. Shadows and reflections are the main problem. A dark shadow under the lion’s paw is just a shadow, and it still ends up as a hole.
Letting Nano Banana draw the depth map
A few days earlier I had been playing around a lot with Nano Banana 2, Google’s new image generation model (just Nano Banana from here on). And then I thought: I could simply ask it for the depth map. It just has to draw the crest as a heightmap, without light and shadows. The heights are drawn, of course, so the proportions are Nano Banana’s guess.
So I gave it the photo, with a prompt along these lines:
“A clean grayscale heightmap depth map of [the crest in the photo], top-down orthogonal view, high contrast, smooth gradients for rounded areas, sharp edges for distinct features, solid black background. No lighting shadows, only topological depth information.”
And this is what came out:
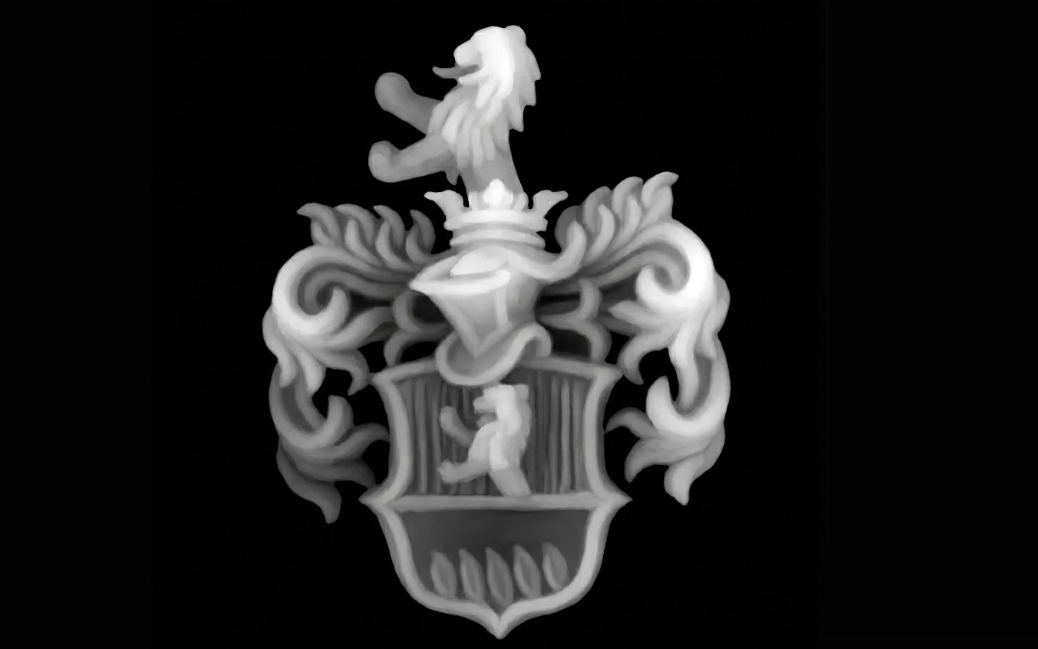
From heightmap to 3D model
The rest is a few lines of Python. The step is usually called displacement: you start with a flat grid of points, one per pixel, and move every point up by the brightness of its pixel. Then the surface gets smoothed a bit, because even a clean image has small steps between pixels. Finally the surface is pushed down onto a flat floor, which turns it into a closed solid that a slicer can work with.
import numpy as np
import pyvista as pv
from PIL import Image


def heightmap_to_stl(image_path, stl_path, width_mm=30, relief_mm=2, base_mm=3, smooth=30):
    # grayscale heightmap: white = high, black = low
    img = Image.open(image_path).convert("L")
    img.thumbnail((800, 800))
    height = np.asarray(img, dtype=float) / 255.0

    # pixel grid scaled to the real size, brightness becomes height
    rows, cols = height.shape
    step = width_mm / cols
    x, y = np.meshgrid(np.arange(cols) * step, np.arange(rows)[::-1] * step)
    z = height * relief_mm

    surface = pv.StructuredGrid(x, y, z).extract_surface(algorithm=None).triangulate()
    surface = surface.smooth(n_iter=smooth, relaxation_factor=0.05)

    # push the surface down onto a flat plane, which gives a closed, printable solid
    floor = pv.Plane(center=(x.mean(), y.mean(), -base_mm), i_size=3 * width_mm, j_size=3 * width_mm)
    solid = surface.extrude_trim((0, 0, -1), floor)
    solid.save(stl_path)
    return solid


if __name__ == "__main__":
    heightmap_to_stl("heightmap.png", "relief.stl")
You need pip install numpy pyvista pillow. The sizes are in millimetres, so with the defaults the crest is 30 mm wide, the relief is 2 mm high and sits on a 3 mm base.
The result
I ran the script on the Nano Banana heightmap. It takes a few seconds and writes a closed STL of 30 × 18.7 × 5 mm:
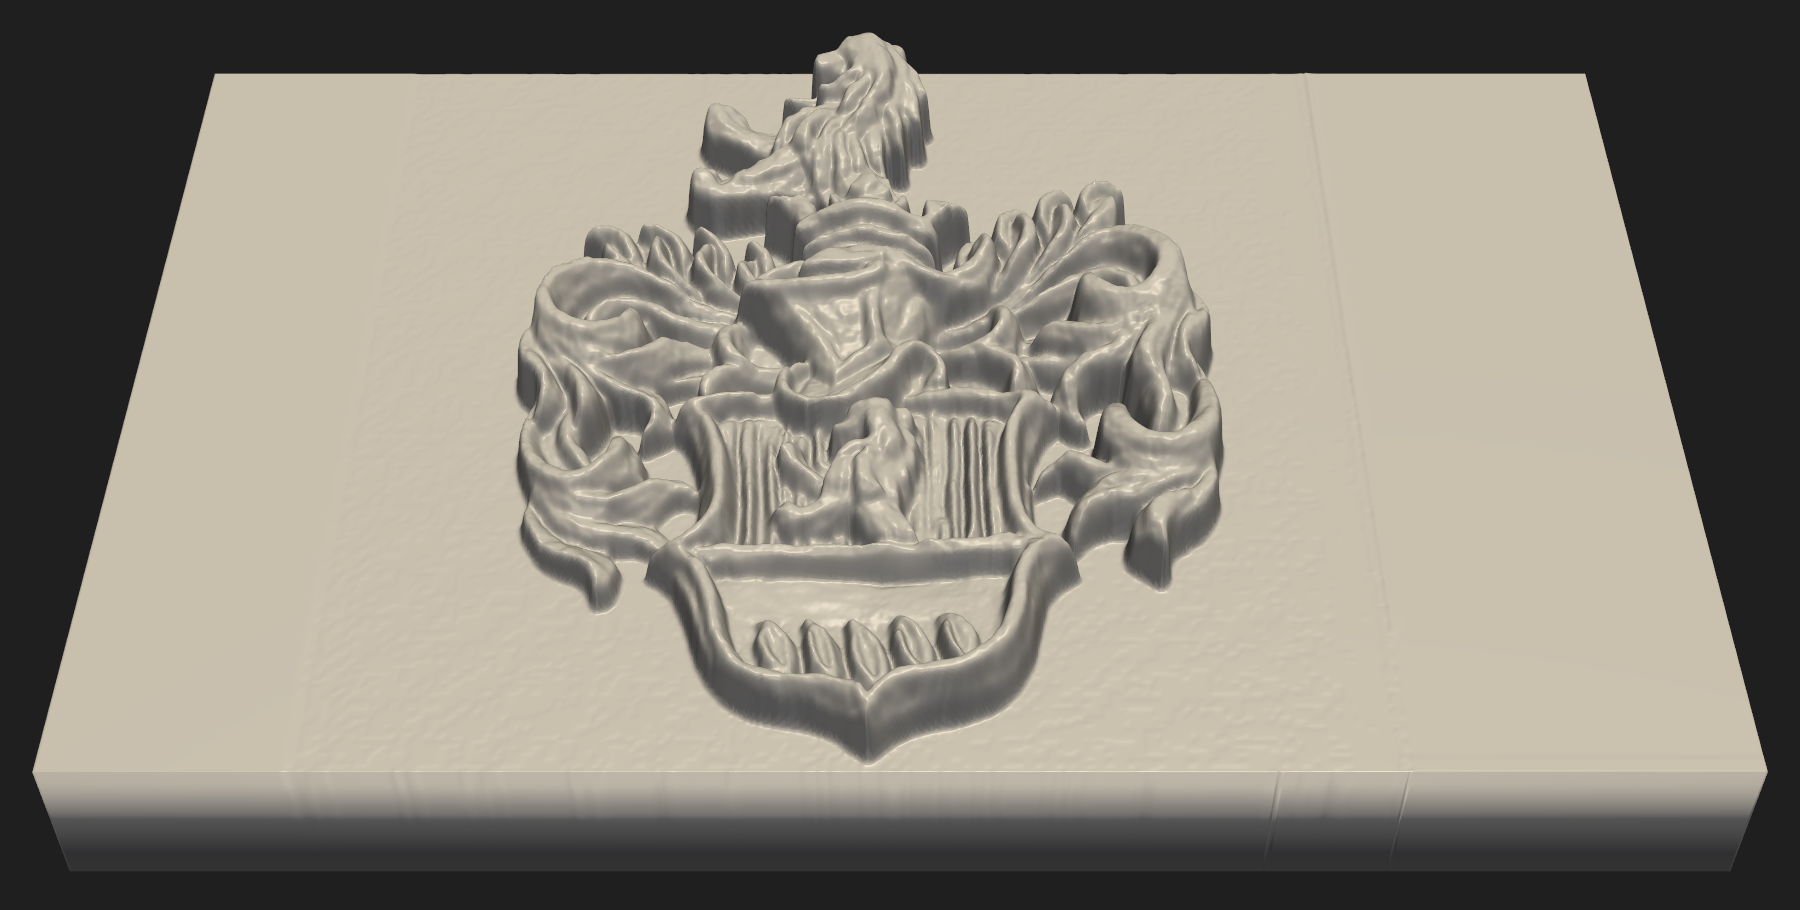
The lion, the helmet and the leaves around the shield all come out as actual shapes, and even the stripes in the shield are still there.
For the real seal there’s one more thing to do before printing. A seal leaves its mirror image in the wax, and the crest has to be carved into the stamp instead of standing out. In the script that’s two extra lines right after loading the image: height = 1 - height to carve it in, and height = np.fliplr(height) to mirror it.
If you try this with your own crest or logo, I’d like to see what comes out.